
How To Embroider And A Few Starter Kits


The Perfect Springtime Craft
Quarantine sourdough? Check. Taking care of new plant babies? Check. Exploring natural dyeing? Check again. If you’re like us, and you’ve worked your way through all the major stages of crafting and self-care over the last year, perhaps you’re searching for a new activity to keep busy. Say hello to embroidery, the perfect springtime craft!
“Embroidery looks to the art of sewing and stitching to create beautiful designs.”
Embroidery looks to the art of sewing and stitching to create beautiful designs, whether on a fabric canvas or straight onto apparel or totes. Here’s our step-by-step guide on how to embroider and a few embroidery starter kits to help you master this calming craft.
If embroidery isn’t for you, try these craft kits and creative hobbies instead!
Step 1: Gather Your Supplies
All you really need to start embroidering is a needle and thread. For beginners, we recommend a few extra tools to help get you on your way: The right fabric, a sturdy hoop, high-quality thread, an embroidery needle, either a disappearing ink pen or pencil for patterns, and a small sewing scissor.
-
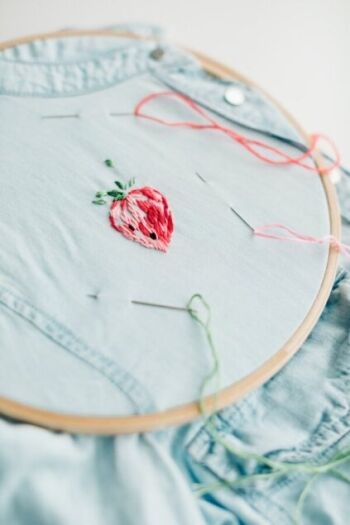
First, consider the kind of “canvas” you’ll be working on. While you can stitch right onto clothing or durable canvas, the best introductory option is embroidery fabric. Embroidery fabric will come with lines (like these), so you can more easily get the hang of stitching. Alternatively, you can look at linen or cotton—both are light enough to hold patterns but not so thick that you can’t get a needle through.
-
Next, you’ll want an embroidery hoop, or the “holder” for your fabric. We love wooden hoops between four to six inches to start, but you can find hoops anywhere from one inch to 20-inch+. Find one that feels comfortable and manageable for your hands.
-
The best thread is embroidery floss, which usually includes six strands. Pick these up at your local arts and crafts store or online through DMC, which offers more than 500 colors.
-
Rather than using a sewing needle, get a tapestry or embroidery needle, available in various sizes. A smaller number means a bigger needle eye, so the most helpful ones are between sizes three and nine. Similarly, you’ll want two pairs of scissors—the aforementioned household pair and a smaller one for the thread itself.
-
Lastly, to easily transfer patterns, grab a pencil or disappearing ink pen.
Step 2: Prep Your Pattern & Hoop
When you begin looking for embroidery designs, there is no shortage of patterns on the ol’ world wide web. Find beginner patterns for free online, pick up PDFs to print out for just a few dollars, or pick up an entire starter (recommendations below!). Ideally, look for patterns with simple stitches and a lot of negative space to start.
“Ideally, look for patterns with simple stitches and a lot of negative space to start.”
Using your pencil or disappearing ink pen, lightly trace the design onto your fabric. If you’re having difficulty seeing it clearly, hold them both up to a window to let the light shine through.
Once that’s traced and centered, hoop the fabric. There will be two circles to your hoop, the inner and outer; first, separate the two by loosening the screws. Then place the smaller circle under your pattern and take your larger circle and match them up on the fabric. Then tighten it until the fabric is thoroughly stretched and taut like a drum (like this)!
Step 3: Start Stitching
Congratulations! You’re ready to thread the needle and start stitching. Remember, most embroidery flosses come with six strands, and tutorials will often explicitly list the number of strands needed per stitch. For most fabrics, our resident embroiderer (and Social and Community Lead) Alyssa recommends separating the floss into three and three; you can go as lightly as one thread on delicate vintage fabrics. For length, aim for about two to three feet for each color, depending on the design’s intricacy. Thread this into your needle and tie a knot at the other end.
“Tutorials will often explicitly list the amount of strands needed per stitch.”
There are four main stitches any beginner should learn: The running stitch, back stitch, chain stitch, and satin stitch. Here’s how you can do each—and a video tutorial as a visual:
-
Running stitch: A completed running stitch should look like a dashed line. Bring up the needle from the back first, and then decide where you want the “dash” to end and pull the needle back through. Go the same length from behind and pop the needle back up, repeating the dash and pulling back through.
-
Back stitch: The back stitch begins the same way, pulling the needle up from the fabric. Once you create a dash, feed the needle back to the other side and come up again like a running stitch. But instead of making a new dash, you’ll go back to where the last dash ended and pull through. Come back up now where a new dash would be and then repeat.
-
Chain stitch: Like its name, a chain stitch should resemble the links of a chain when complete. Begin the same way as before, pulling the needle up. Then, bring the needle back to almost exactly where you came from, but not the same hole you just made. As you’re pulling the thread through, a small balloon-like loop will appear. Hold that loop with one hand, and use the other to bring the needle up through it to create your first “chain.” Repeat the process as needed.
-
Satin stitch: The satin stitch comes in handy when you’re covering a lot of ground with one color, like the petal of a flower or filling in a letter. In this case, pull the needle up from the back like before and bring it to the edge of your pattern; for example, this could be one inch-long stitch from one side of an “L” to another. Then feed the needle back up from where you came, and stitch back to the beginning. Continue until everything is filled in.
If you’re ready to move on from beginner stitches, there are many others to master; this YouTube video shares 10 styles on the same hoop so that you can see the difference in each.
Whenever your embroidery floss ends, finish the stitch you’re on and thread it under. Cut it and tie it into a knot, and then re-thread the needle and start again! You’ll quickly learn how much floss you need for a specific design so you can then avoid re-threading as much as possible.
While you can certainly piecemeal embroidery floss, hoops, and designs separately, it’s often easier to pick up a pre-made kit. Here are five embroidery starter kits that offer eco-friendly materials, bold and colorful designs, and various fabrics and canvases.
1. Pretty Strange Designs

Made In | Ohio Best For | Eco-friendly materials (and message!) Price | $32
Pretty Strange Designs’ design is as eco-friendly as the materials themselves, including recycled polyester and bamboo hoops and a dissolvable sticker. Each kit also includes the needle, embroidery flosses, and directions needed to get down to DIYing. While this design is exclusively featured on Uncommon Goods, one of our favorite certified B Corps, you can also find additional kits at Pretty Strange Designs’ Etsy shop!
Shop Pretty Strange Designs
2. Stitch With Skye

Made In | The UK Best For | Feminist hoop art & banners Price | $31–$57
Based in the UK, Jade Loomes launched Stitch With Skye in 2019 with embroidery designs inspired by feminism and body positivity. (And in case you’re wondering, the ‘Skye’ in the shop name is Jade’s cocker spaniel!) Each kit includes 100 percent organic cotton fabric that’s pre-printed with the pattern, so you don’t need to worry about tracing. You’ll also receive printed versions of the pattern to reuse in the future, digital access to online videos, and illustrated instructions from start to finish. It’s no wonder this Etsy shop has five stars, with 6,500+ reviews.
Shop Stitch With Skye
3. Pixels and Purls

Made In | The UK Best For | Bold & colorful patterns Price | $17–$29
Sara Davey is the designer and maker behind Pixels and Purls. Each pattern is drawn first in a sketchbook and then transferred to Procreate and Illustrator to come to life. In addition to festive seasonal kits, you can find floral and pop culture-inspired pieces with feminist and progressive phrases. And Sara’s done all the prep for you; all you need is a pair of scissors. Best of all, this kit is sent via carbon-neutral shipping and in plastic-free packaging!
Shop Pixels and Purls
4. Nelly Makes Embroidery

Made In | The UK Best For | Intermediate & advanced stitching Price | $28–$89
Nelly Makes Embroidery has sold nearly 10,000 embroidery kits to satisfied customers all over the world. Seen as creative therapy, this Etsy shop carries dozens of designs, from cutout words like “inspire” and “hope” to planetary patterns. Our favorites include the kits with dark backgrounds, as patterns are printed directly onto the calico cotton fabric. If you’re ready to make a serious commitment to embroidering, definitely start here.
Shop Nelly Makes Embroidery
5. Chloe Art Crafts

Made In | Nebraska Best For | Translucent embroidery Price | $14.99–$29.99
For creative embroidery kits that you won’t find elsewhere, check out Chloe Art Crafts. The shop carries an affordable line of translucent embroidery, tote embroidery kits, and even custom options! Most designs are inspired by gorgeous botanicals and florals, making them the perfect home decor or gifts once complete. Prepped and packaged in Omaha, Nebraska, these starter kits will have you feeling like a pro in no time.
Shop Chloe Art Crafts
The Good Trade editors endorse products we genuinely love. If you end up making a purchase through one of our affiliate links, we may earn a commission. Learn more here.


