Create The Perfect Fit: How To Hem Your Clothes By Hand


Hemming gives clothing new life.
A tidy hem makes any purchase feel custom and high quality without you dropping all of your money on a designer garment. Plus, by hemming your ill-fitting clothing instead of donating or tossing it, you can help keep more clothes out of landfills.
“Hemming or mending your own clothes links you more closely to each garment and keeps the disposable economy at bay.”
Even though hemming can be an affordable alteration, it can still be time consuming or otherwise inaccessible. Learning to do this all yourself saves you money while also empowering you to take responsibility for your purchases.
Hemming or mending your own clothes links you more closely to each garment and keeps the disposable economy at bay. Clothing is personal; let’s keep it that way.
Tools Needed
Needle – You don’t need anything fancy, though you’ll want a larger/thicker needle for sturdier fabrics and a smaller needle for more delicate materials. If the needle is too large, it will leave visible holes in your garment!
Thread – Make sure your thread is sewing thread, not embroidery thread or anything funky. Now is not the time to experiment. It’s also vital to find a thread that blends into your garment (unless you are going for a contrasting look).
Straight Pins – These are a game changer if you’ve been trying to sew without them! Try them.
Ruler – This is self-explanatory and you don’t need a special ruler, although a gridded ruler is helpful in many cases.
Fabric scissors – I know it may seem silly to beginner sewers to invest in a new and more expensive pair of scissors just for fabric, but trust me, it’s a worthwhile investment.
Iron – Again, it’s not absolutely necessary, but really will make a difference.
Chalk or Wax – This also isn’t vital to the project, though it’s incredibly useful. Having sewing chalk, sewing wax, or a fabric marker makes the process of amateur sewing significantly less overwhelming.
Before we officially dive in, I have two disclaimers:
There will always be slight variations to this method depending on the garment and fabric.
I do not advise attempting to hem bulky fabric (like denim) by hand because it won’t turn out well.
The Perfect Hem, Step By Step
1. Decide on the Hem
Deciding where your garment should be hemmed is entirely up to you, although there are some recommendations for various types of clothing. According to Sew Guide, it’s best to pin your desired pants hem at four points: the center front, center back, inseam, and side seam.
If you are hemming a garment with less structured fabric (think silk or polyester), you’ll want to pin it more than four times. Try to pin your hem with the pins working through the fabric horizontally, not vertically.
An important thing to remember is the benefit of double or triple checking your pinned hem so that this new look won’t be crooked (unless you are going for an asymmetrical look). Enlisting a friend or family member to help you determine the hem is a great idea if you can swing it!
2. Prepare for Cutting
To prepare the hem for cutting, make sure the garment is turned inside out, then iron the folded hem. Remove the pins as you go; the crease from the iron should hold the desired hem in place. If the fabric refuses to hold the fold, use a basting stitch to keep it in place. You can find an easy tutorial on how to hand baste here.
Once your desired hem is secure, decide how wide you’d like this new hem to be. This is also up to you, though sewing veterans advise matching the new hem with the original hem width as much as possible. Other tips are to keep pant hems around 1 ¼” – 1 ½” and dress or skirt hems around 1 ½” – 2”.
Mark this hem with a fabric pen, wax, or chalk, measuring from the fold line. Some garments will require a double fold method in order to maintain a clean hem. Find a simple tutorial for it here.
3. Cut the Fabric
Use your marked hem width as a guide for cutting away the excess fabric. A great visual for this can be found here. Make sure you are absolutely satisfied with your hem width before doing any cutting because there are no do-overs once you’ve cut the fabric.
4. Prepare for Sewing
To keep the raw edge of the newly cut fabric from fraying, fold it in ¼” and iron it in place. A helpful visual for this can be found here.
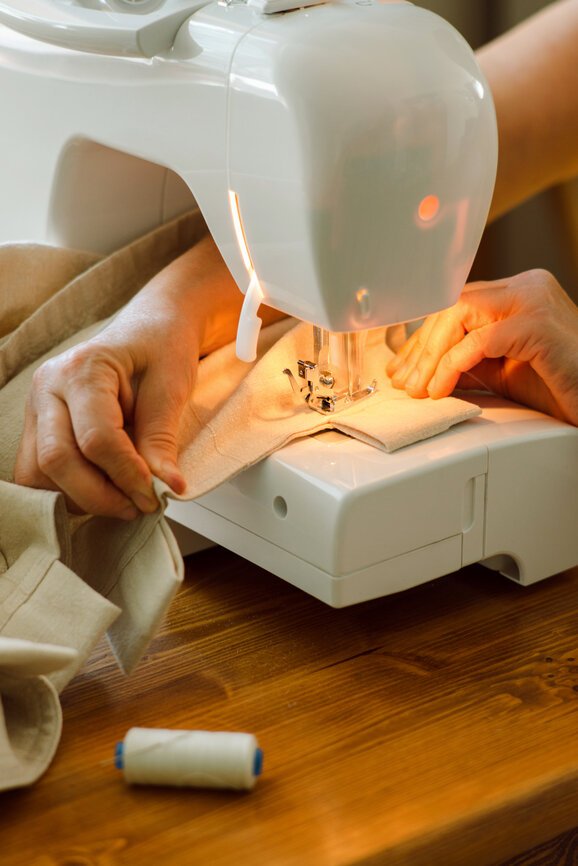
5. Sew the Hem
Cut a piece of thread about 18–20” long, slip it through the eye of the needle, and knot only one of the ends. Sew the ¼” fold you just completed by using a slip stitch. This method will ensure there are barely any markings found on the outside of your garment.
Helpful tutorials of a slip stitch can be found here. Once you’ve stitched around the entire rim of the clothing item, secure your work by dipping the needle into the first layer of fabric a few times to make a knot. Find a few variations of end-of-sewing knot tying here.
6. Enjoy Your Hard Work!
Congratulations on completing your first hemming project! We hope you’ll continue tailoring your own clothes to save money and benefit the environment.
Audrey Stanton was born and raised in the Bay Area and is currently based in Los Angeles. She works as a freelance writer and content creator with a focus in sustainable fashion. Audrey is deeply passionate about conscious living and hopes to continue to spread awareness of ethical consumption.