
How To Sew Your Own Clothes

When I first learned how to sew in middle school, I was frustrated by the process. And it wasn’t until many years later, after taking a basic pattern drafting class with Cal Patch, that something clicked. I started sewing and haven’t stopped. For over ten years, I’ve taught countless others how to make garments, too, even releasing my first sewing book. I’ll happily share tips to get you stitching as well.
The benefits of sewing your own clothes are many. You are the one making the decisions. If you want to build an all-linen wardrobe, you can do it one piece at a time. Or maybe there’s a particular palette or color combination that strikes your fancy. You aren’t limited by trend forecasting or what’s on the shelves at any given moment. It’s a liberating practice, but it can also be hard to know where to start.
1. Find a pattern

Take a look at your clothes. Sometimes this is less about examining what’s hanging in the closet and more about what ends up in your laundry basket. Determine what you wear and then use your answer to help decide what you’d like to sew.
For a first garment, choose a simple, beginner-friendly pattern — like a boxy top or a simple skirt with an elastic waist. Many indie pattern companies sell patterns; I have my own shop, 100 Acts Of Sewing, and I also recommend Grainline Studios, Made by Rae, Seamwork, and Christine Haynes.
2. Take measurements
The next step is taking measurements. You’ll need a soft measuring tape (also called a tailor’s tape), a pencil, and a notebook. Measure your chest at the fullest part, waist, and hips. If you need a visual reference, YouTube has many great tutorials, including this one.
Note your measurements down and compare them to the sizing on the pattern. If you’re in between sizes, or you find your bust measurement is one size and your waist is another, don’t fret! Instead, get yourself some tracing paper (that roll of parchment paper from all your pandemic baking will also work in a pinch), and trace out the pattern. This is the time to make any simple adjustments to the pattern, such as lengthening or shortening. When you’re finished, cut out the traced pattern and write out all the information — called pattern markings — like the name, size, the fold line and how many pieces to cut out. More on this later.
3. Shop for fabric

Now that you have your pattern and size, you can move on to the fun part: Shopping for fabric. Visiting a store allows for a visual and tactile experience, but you can also shop online as many sellers offer swatches or samples. A few shops I recommend include Fancy Tiger Crafts, Miss Matatabi, and Blackbird Fabrics.
In the broad classification system of fabrics, there are two distinct types: Woven and knits. Woven fabrics tend to be a bit more beginner-friendly and include lawn, twill, and double gauze. Alternatively, knit fabrics have a stretchy quality, making them more comfortable to wear. Just note that knits are a bit more difficult to work with and it might be better to save them for after you’ve tackled a few projects.
Two other important variables when it comes to choosing a fabric are weight and material. Consider the garment you’re making and what you’ll want from your fabric. For example, lightweight fabrics like cotton batiste or handkerchief linen are semi-transparent (requiring a lining), though they tend to hold a press better. Chambray or seersucker are both medium-weight and are good choices for tops or dresses. Hard-wearing denims and cotton canvas are more suitable for jackets, trousers, or tote bags.
These are just a few of the many options. To learn even more about different fabrics, check out our sustainable fabrics 101 guide.
4. Prep & cut fabric
Wash your fabric. As most fabric shrinks, you’ll want to wash yours before beginning to sew (wash and dry the fabric in the same way you intend to treat the finished garment). If it wrinkles, simply give it a quick press, using the appropriate settings on your iron.
Fold your fabric. Pattern pieces are often the same on both sides, so they will have fold lines to take advantage of the symmetry while ensuring that both sides of your garment will match. Think of it like folding paper in half to cut out a heart. Take the time to carefully fold your fabric in half and smooth out any large wrinkles.
Take note of the grainline arrow on the pattern. This refers to the direction of the warp threads for woven fabric (the vertical threads placed on a loom). The weft threads go under and over, depending on the particular weaving pattern. The arrow is there to indicate how to orient the pattern piece in relation to the grain of the fabric. Cutting a pattern piece askew or off-grain may lead to slight twisting once the pieces are sewn together. For further reading, check out this article.
Pin, trace, and cut. You can either use the pinning method — this was the way I was taught when I learned to sew — or you can use pattern weights. Simply place the pattern on the fabric and use weights, so it doesn’t shift; then trace around it. You can trace with chalk, fabric pencil, or any tool that won’t leave a permanent mark. Once you’ve traced your first piece, make sure you have enough fabric for the remaining pieces. Also, if your fabric has a large print, this is the time to check the placement. You might want to avoid a pair of big flowers right at the nipples. If everything looks fine, then cut the pieces out.
5. Time to sew
After all that work, it is finally time to sew! For this step, you’ll need: A sewing machine, sewing machine needle, washi tape, ruler, thread, pins, small scissors, iron, and a pressing surface. While you can sew by hand, a machine will be more efficient for beginners.
While sewing machines vary in makes and models, they have multiple points where the thread travels from the spool to the needle. These help keep an even tension, which in turn helps create even or balanced stitches. Make sure you have a new needle and that it’s the appropriate size for the weight of fabric you’re using.
I recommend using a piece of leftover scrap fabric to test-sew before starting your project. This way, you can check how the thread looks next to the fabric and how the stitches themselves are behaving.
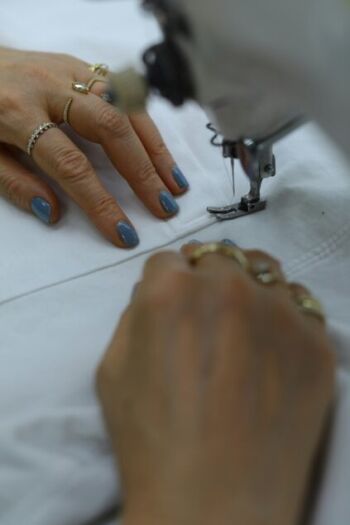
Working on a flat surface, lay the piece out with the right side up. Then place the second piece on top, so the right sides are touching. Seams are hidden inside our garments and, to achieve this, we sew with the right sides together (RST), sometimes called “right sides facing.” The right side refers to the outside of the garment (the side you want to be seen). For some fabrics, this will be obvious (see photo), while printed or woven fabric might look the same on both sides. If that’s the case, just pick one side. You can mark it with chalk or a piece of tape if you feel like you might get confused.
Pin these pieces together following the pattern instructions. Place the pins perpendicular to the edge of the fabric. While the temptation to sew over the pins is strong, it’s better to remove them as you sew. This way, you avoid the possibility of breaking the needle if it hits a pin or driving the pin down into the machine.
You’ll also want to keep the seam allowance in mind as you sew (the specific distance away a seam should be from the edge of the fabric). The instructions will note how much the pattern calls for. Depending on what you are sewing, the seam allowance could be anywhere from 1/4 inch at a neckline to 7/8 inch for a side seam. Getting this correct is important, since sewing with too wide a seam allowance will result in a garment that’s too small, or conversely, sewing with too narrow a seam allowance yields a garment that’s far too big.
Familiarize yourself by taking a small ruler and measuring the distance from the needle. Most sewing machines have lines in the stitch plate with multiple measurements; some have seam guides as an attachment. Using a strip of washi or masking tape can help make it clearer and act as a visual guide.
6. Edges & finishing touches
The edges of the fabric require some attention. If left as is, they run the risk of fraying with every wash and eventually, there might not be enough fabric to hold the seams together. Preventing fraying is easy enough, with a range of options:
- Pinking shears. This is a special type of scissors that cuts small triangular notches. This stops long threads from forming and unraveling along the edges.
- Zigzag stitch. A basic stitch setting on many machines; sewing at the edge helps grab hold of the thread and keeps them from separating.
- French Seams. A method where the edges are sewn twice and enclosed. As you sew more, you might want to experiment with this polished-looking finish.
- Serger. A separate machine with two needles and three or four spools of thread. It cuts and encloses the edge in a very speedy fashion. But the downside is they can be notoriously difficult to thread.
Necklines and hems are edges that need special attention. The curve of the neckline poses a particular challenge with its curves. It requires finishing with separate pieces of fabric cut to the same shape as the neckline (called facings) or bias tape.
As this part of garment sewing often presents the biggest challenge, I recommend using visual aids to help. Here is a video tutorial.
Take it slow on the machine, or you might even consider ditching it altogether and opting for hand sewing. Remember, you are learning a new skill, and with anything, it takes time. Give yourself permission to make mistakes and note the progress you make in your new craft instead of seeking immediate perfection. Most importantly, have fun!
Have you tried sewing your own garments? I’d love to hear about the clothes you’re making in the comments below!
Sonya Philip is an artist, designer, and teacher. Years ago, Sonya started 100 Acts of Sewing, making dresses while documenting the process. Since then she has made it her mission to convince people to sew their own clothes. When not covered in bits of thread, she can be found knitting another shawl or cardigan. Sonya lives in San Francisco with her family.


